Building a Connector
To get started with a new data source in the Tuva Project, for which there is no pre-built connector, you must build a custom connector. In the context of The Tuva Project, a connector is a dbt project containing SQL models that standardize and transform raw data so it meets the expectations of the Tuva Input Layer. For example, this can include renaming columns to match Tuva column names, adjusting formats of the columns so that the values match the Input Layer and transforming the data when the expected values in input layer rows have a different grain (level of detail or uniqueness of each row of a table, or what each row represents) than the source data.
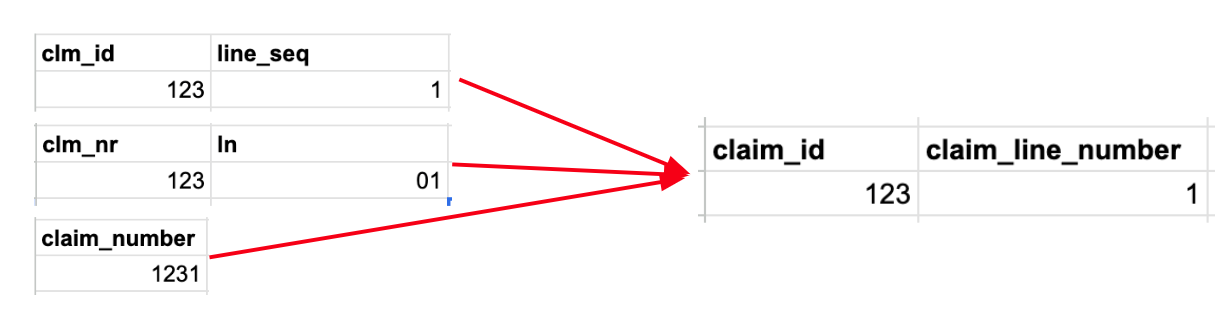
The image above shows an example of the following transformation steps that would all be performed within a connector:
- Column Names: Source column names (like clm_id or clm_nr) must be renamed to align with the Tuva column names in the Input Layer (claim_id).
- Data Types: Additionally, in the second source example, claim_line_number is stored as a string with a leading zero in the first position, but the Tuva Input Layer requires that it be stored as an integer, so the data type must be adjusted.
- Logical Transformations: Occasionally information in the source may be contained within fewer (or more) columns (or rows) than specified in the Input Layer. In this example, claim_number in the source data is a concatenation of the value of claim_number and the claim_line_number. The Tuva Input Layer requires claim_number to be named claim_id and to contain only the claim header ID. The claim_line_number must be extracted in the third data source and placed in the claim_line_number column.
This guide describes how to build a connector using our Connector Template. The video below summarizes this.
Prerequisite: Source Data Is Already Loaded
Before you create a connector, your claims data, clinical data, or both should already be loaded into your cloud data warehouse. We typically load source data into a raw schema named raw_<data_source>.
Your connector will read from those raw source tables and transform them into the Tuva Input Layer.
Step 1: Create a New Repo from the Connector Template
First, get the connector template onto your local machine.
- Visit the Connector Template repository on GitHub.
- Click Use this template.
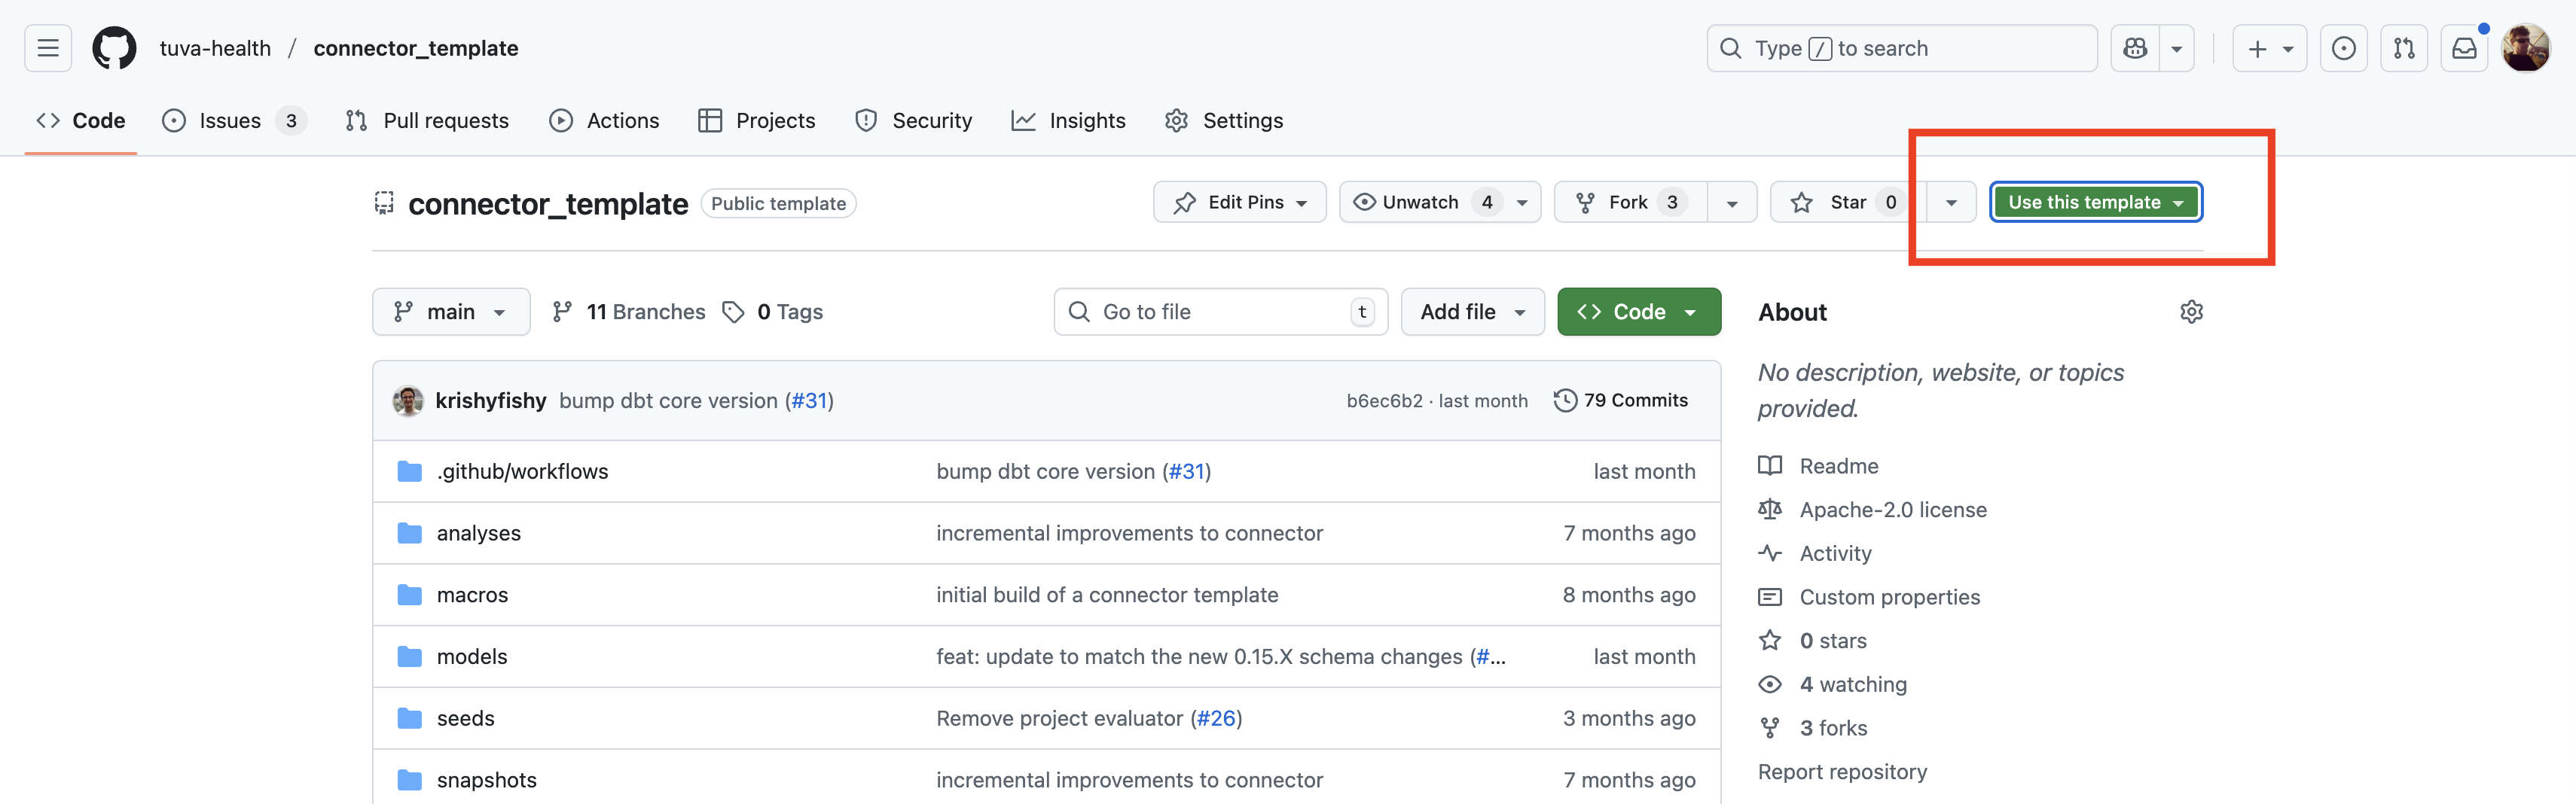
- Name your new repository. We recommend choosing a name that aligns with your data source, for example
uhc_claims. - Click Create repository.
- Clone the new repository and open it in your editor.
git clone https://github.com/your-username/my-connector.git
cd my-connector
Step 2: Update dbt_project.yml
The dbt_project.yml controls the core behavior of the connector, including the project name and which parts of Tuva should run.
- Rename the project:
name: my_connector
- Rename the top-level key under
models:so it matches your new project name:
models:
  my_connector:
    +schema: input_layer
- Keep the dbt ref behavior flag enabled. The current connector template already includes this flag.
flags:
  require_ref_searches_node_package_before_root: true
This preserves package-aware ref() resolution. Keep connector Input Layer models in the root project with their documented names; Tuva's package-owned wrappers reference those models.
- Set the minimal connector variables based on the type of source you are mapping.
For a claims connector:
vars:
  claims_enabled: true
  clinical_enabled: false
  provider_attribution_enabled: false
For a clinical connector:
vars:
  claims_enabled: false
  clinical_enabled: true
  provider_attribution_enabled: false
Use native, unquoted YAML booleans. Quoted "true"/"false" and direct env_var() strings are rejected by Core. To build provider attribution, including Tuva-generated assignments, set provider_attribution_enabled: true with claims_enabled: true; attribution is not a clinical-only feature. This also requires the connector-owned provider_attribution Input Layer model, even if you have no payer-supplied attribution values. Follow the provider attribution guide.
Step 3: Configure and Test Your dbt Profile
Make sure your profiles.yml in ~/.dbt/ is configured so dbt can connect to your warehouse.
Validate the connection with:
dbt debug
Do not move forward until dbt debug succeeds.
Step 4: Install dbt Dependencies
Pin Core in the connector's root packages.yml. Replace any Core Hub entry inherited from the template with the Git entry below; do not install both forms of the same package.
packages:
  - git: "https://github.com/tuva-health/tuva-core.git"
    revision: "v1.0.0"
Add each selected standalone package to this same file at its v1.0.0 Git tag. Installation enables that package; Core alone does not install the marts. Check the package's required claims or clinical inputs before adding it. See Getting Started for installation guidance and the Data Marts overview for package choices.
Install the declared dependencies:
dbt deps
This supported Git installation works independently of dbt Hub indexing. Keep the generated package-lock.yml with the connector to record resolved dependencies.
Step 5: Begin Building Your Models
The connector template is designed around two model layers:
models/staging/models/final/
Use models/_sources.yml to define the raw source tables your connector reads from. Update the schema and table names there so they match the tables that already exist in your warehouse.
The template defaults to source names that already look like Tuva input-layer tables. In practice, most users will need to update both models/_sources.yml and the staging models so they point to the actual raw claims or clinical tables in the warehouse.
The intended pattern is:
staging/is where casting and light source alignment happenfinal/exposes the Tuva Input Layer tables
Preserve data_source in every claim-line identity and in joins between source-scoped records. For medical and pharmacy claim lines, validate uniqueness of (claim_id, claim_line_number, data_source) after resolving source adjustments and reversals. Preserve populated medical-claim diagnoses even when the claim cannot be classified; classification-specific filters belong in grouping logic.
Keep the input_layer tag on your connector models, or add it if you create new models. This makes it easy to build only the connector output before running the rest of Tuva.
If the source contains organization-specific columns that are not part of Tuva's standard contract, use Column Extensions. Extension columns are supported only between the 14 same-named Input Layer and Core table pairs described in that guide.
Step 6: Build and Validate Only the Input Layer
On a fresh installation, first load Core assets, including the terminology required by Logical Data Quality. Reuse existing assets when their version, seed schema, and loader contract are unchanged.
dbt seed --select package:the_tuva_project
Once you have a first pass of your staging and final models, build the connector's Input Layer models and then materialize the Tuva Core Input Layer Wrappers:
dbt build --select "package:<your_connector_project_name>,tag:input_layer"
dbt run --select "package:the_tuva_project,tag:input_layer"
Replace <your_connector_project_name> with the root dbt project name. A Connector Template revision aligned with Tuva Core 1.0 applies +tags: [input_layer] at the connector project root, covering its staging and final model directories. For an older or custom project, tag both layers or select their explicit paths so all required staging relations are built. The second command materializes the package-owned wrappers without running their attached data tests first, allowing Structural Data Quality to report readiness problems. The complete project build in Step 7 still runs those tests.
Run Structural Data Quality first:
dbt build --select tag:dq_structural --vars '{data_quality_enabled: true}'
The connector must define every Input Layer Model in each enabled domain. This includes provider_attribution when its switch is enabled. When the source lacks a required table, a zero-row model with every contract column explicitly cast to its declared type can satisfy the dbt reference and column contract. It leaves table_populated failed and primary_key_correct not evaluated. Rerunning an unchanged empty input cannot complete the all-pass readiness check. Resolve the source population or revisit the enabled domains and features and the affected analytics; an empty model does not demonstrate data readiness.
A missing or disabled model prevents dbt from resolving the Input Layer, and a failed Tuva Core Input
Layer Wrapper must be repaired before running Structural Data Quality. The
Structural command above inspects the Wrapper Warehouse objects built earlier in this step
and raises a clear error directing you to rebuild them when an object is
unavailable. The dq_structural tag includes the readiness matrix, normalized
structural_test_results, the three failure-only detail tables, and their
internal helpers.
Review columns_exist, data_types_correct, table_populated, and
primary_key_correct in the source-scoped data_quality.structural readiness
matrix; use row_count to confirm the population behind each row. Fix every
fail and every prerequisite behind a not evaluated result, then rerun
Structural Data Quality. Continue to Logical Data Quality only when all four
results pass.
Trust these results only after the command completes successfully. A failed run can leave earlier Data Quality tables in place, and disabling Data Quality does not drop them. Serialize runs that write to the same target schema because Tuva Core does not store run provenance or refresh history.
Then run Logical Data Quality:
dbt build --select tag:dq_logical --vars '{data_quality_enabled: true}'
Use this loop while mapping:
- Build the Input Layer.
- Resolve blocking structural failures.
- Investigate logical failures at their native grain.
- Update the connector and rerun until every remaining issue is understood.
For commands, result queries, and worked examples, follow the Data Quality Tutorial.
Step 7: Build the Full Project
Once your connector and input layer look sound, build the rest of Tuva:
dbt build
Review the Core outputs and each standalone package you installed. A first full dbt build loads the required package seeds as well as building models and running tests. If you enable Data Quality for this run, pass the same native boolean variables used during the focused checks. If the results do not make sense for your source data, go back to your connector models, correct the mapping, and rerun the validation workflow.